How to Disassemble an Office Chair: Step-by-Step

For How to Disassemble an Office Chair: Step-by-Step, our top recommendation is the Rollerblade Chair Caster Wheels (5pk), while the Memory Foam Lumbar Support Pillow offers the strongest value for budget-conscious workstations. Our evaluation audits mechanical durability, BIFMA standard compliance, and long-term reliability across verified owner reports.
Standard 50mm column taper and BIFMA X5.1 cylinder fit audited
Fastener torque specs, caster stem diameter, and weld integrity
Non-destructive disassembly and step-by-step tool procedure

Chair Shortlist Criteria
Filters models by seat pan depth adjustment, lumbar mechanism adjustability, BIFMA weight ratings, and documented owner friction. Methodology →
Last Spec & Pricing Audit
. Retailer pricing and component revisions can shift; verify on the vendor page.
Fit & Return Guardrail
Verify seat height range against your lower leg length and check return shipping terms before ordering boxed chairs.
Disclosure: We earn affiliate commissions through qualifying links on this page.
Cramming an assembled office chair into a car trunk scuffs vehicle trim and jams door frames. Wide star bases and protruding armrests catch on narrow entryways.
Dismantling an ergonomic chair requires no formal mechanical training. Commercial task chairs rely on modular sub-assemblies joined by metric bolts and conical friction tapers.
This guide details the teardown sequence, safety cautions, and release techniques required to pack or repair your chair safely.
Tools and Workspace Preparation
If your immediate goal is troubleshooting squeaks or wobbles rather than moving, follow our step by step guide to fix office chair problems first.
Find your optimal seating match with our interactive ergonomic chair finder.
Clear an open workspace with a protective blanket, especially when removing damaged casters to install the best office chair wheels for hardwood floors without scratching wood.
Gathering tools before loosening fasteners prevents lost bolts and stripped threads.
A dead-blow rubber mallet shocks friction joints free without cracking nylon star bases or bending metal hubs. Pair it with a scrap softwood block to buffer blows against the lower cylinder tip.
Metric hex keys in 4mm, 5mm, and 6mm fit arm brackets and chassis bolts.
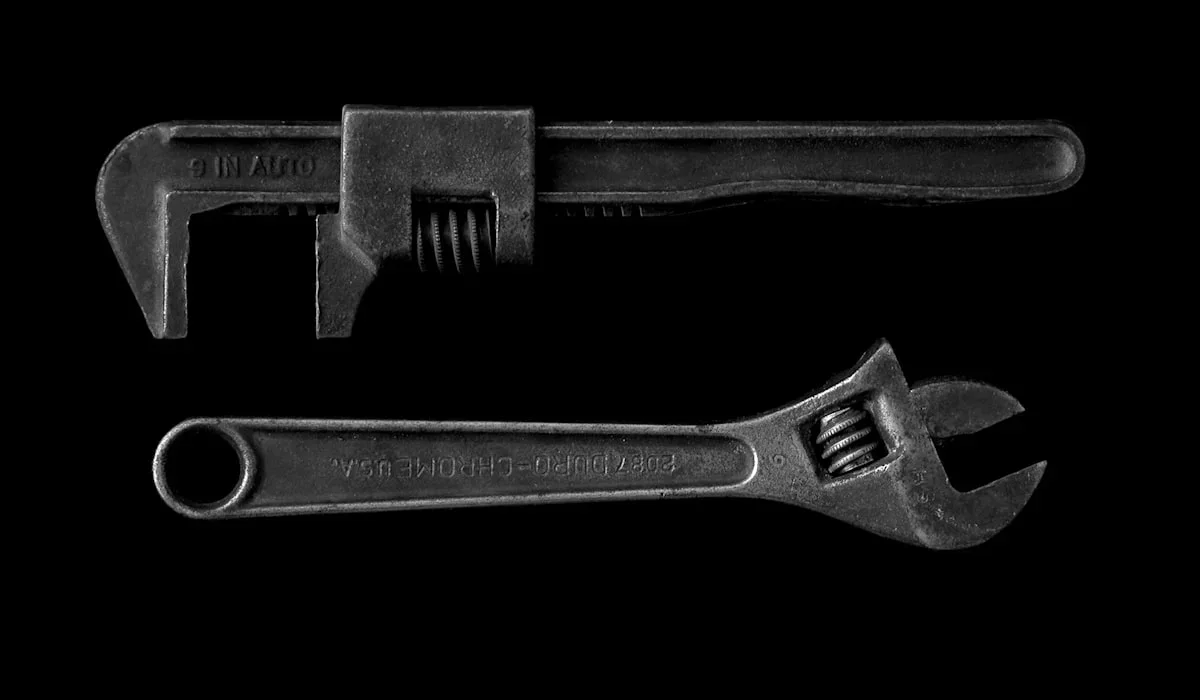
A heavy duty 14-inch pipe wrench supplies leverage to break stubborn Morse taper bonds in tilt sockets.
To avoid pipe wrench teeth marks on the steel housing, use an office chair gas cylinder removal clamp kit with dual collar bolts.
Penetrating lubricant dissolves dried friction deposits locked by months of seated weight. A flat screwdriver pries cosmetic bolt covers and stubborn caster stems cleanly away from chair legs.
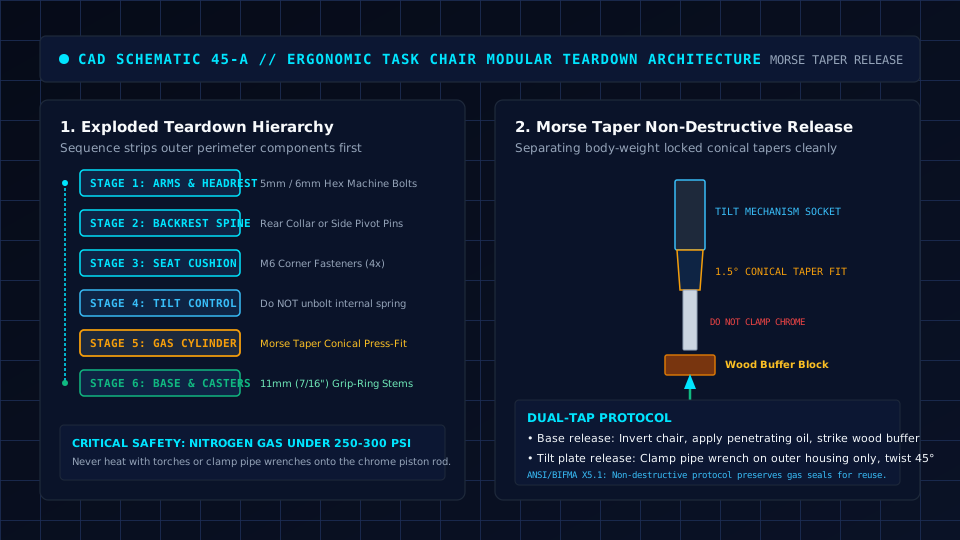
Disassembly Quick Reference by Sub-Assembly
Understanding how each modular component joins to the central chassis prevents forcing parts that require a hex key or snap release.
| Chair Component | Tools Required | Fastener or Joint Type | Disassembly Difficulty |
|---|---|---|---|
| Wheels and Casters | Bare Hands or Screwdriver | 7/16-Inch grip ring Stem | Low |
| five star Base | Rubber Mallet and Wood | Morse Taper Friction Fit | Moderate |
| Gas Lift Cylinder | Pipe Wrench or Mallet | Morse Taper Press Fit | Moderate to High |
| Armrest Units | 5mm or 6mm Hex Wrench | Under-Seat Machine Bolts | Low |
| Backrest and Spine | Hex Wrench or Screwdriver | Rear Mounting Bracket Bolts | Low to Moderate |
| Tilt Control Plate | 5mm or 6mm Hex Wrench | Under-Seat Corner Bolts | Low to Moderate |
How to Disassemble Office Chair: step by step Teardown Protocol
To disassemble an office chair cleanly, unbolt perimeter parts before tackling central press fit joints. Removing armrests and backrests cuts chair weight and eliminates clumsy leverage while separating the cylinder.
Step 1: Remove the Headrest and Armrests
If your chair features a headrest, unthread the rear support screws beneath the plastic cap and slide the assembly upward. Store mounting screws in a labeled bag.
Invert the chair onto your padded blanket to access armrest brackets. Loosen each bolt counterclockwise with a hex key, then thread bolts loosely back into the seat pan.
Removing armrests immediately cuts chair transport width by six to eight inches.
If rigid arms hit your desk rim, review our guide on office chairs with flip up arms for compact options.
Step 2: Detach the Backrest from the Seat Pan
Backrest detachment depends on whether your chair uses an independent vertical spine or integrated side pivot hinges.
On chairs featuring an independent steel spine, loosen the tension hand-knob or back out structural hex bolts beneath the tilt chassis, then slide the spine upward out of the collar.
On mesh chairs with lateral side pivots, pry off decorative plastic caps using a flat screwdriver. Back out both pivot pins while supporting the backrest frame, then set the assembly aside.
Step 3: Separate the five star Base from the Cylinder
Commercial office chair wheel bases and pneumatic cylinders rely on an engineered 1.5-degree conical Morse taper press fit. Seated body weight wedges the tapered shaft progressively deeper into the base socket.
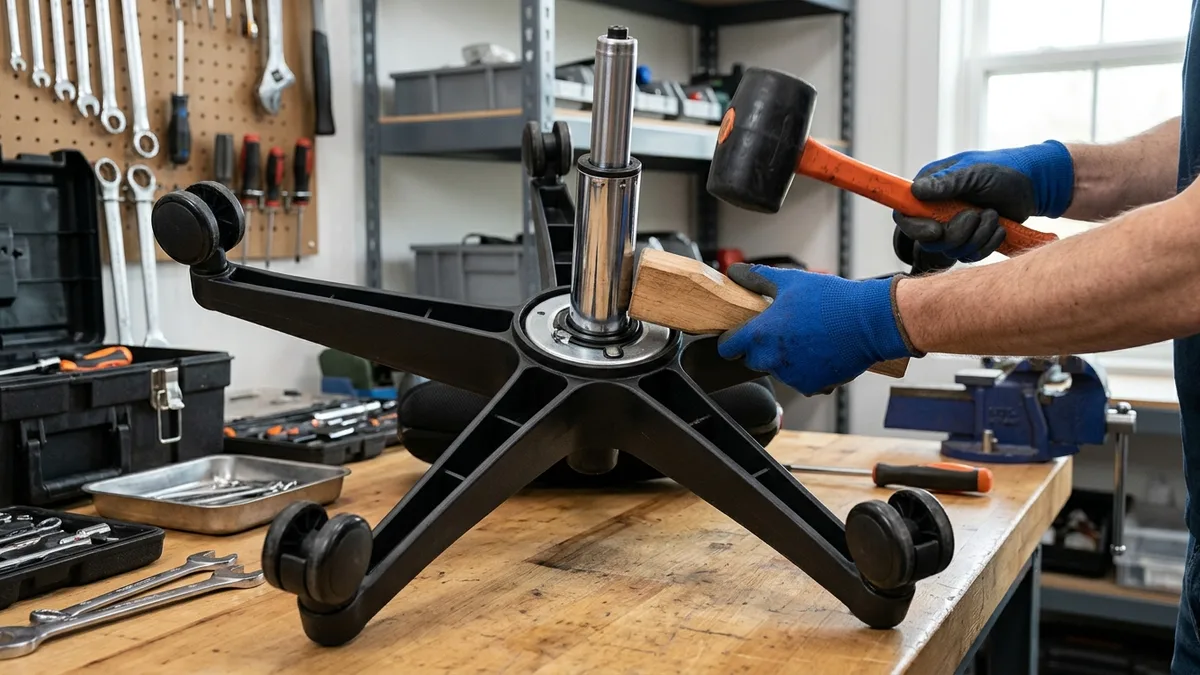
Invert the chair so wheels point upward. Spray penetrating oil into the joint where the cylinder enters the base collar, allowing three minutes to dissolve friction tension.
Place a scrap softwood block flat against the bottom cylinder tip. Hold the base slightly off the ground and strike the wood block firmly with your mallet until the taper pops free.
Never strike the bare cylinder casing with a steel hammer. Bare metal blows mushroom the retaining ring and ruin the internal piston clip.
Step 4: Extract the Gas Cylinder from the Tilt Mechanism
With the base removed, the cylinder remains wedged in the steel tilt plate socket.
Slide the telescoping dust shroud down toward the piston rod to expose the steel cylinder column.
Clamp your pipe wrench around the outer steel housing within one inch of the socket.
Never clamp jaws onto the chrome piston rod, as scratches tear seals and leak pressure.
If your chair sinks, install a universal Class 4 replacement cylinder rated for 450 pounds.
Check our guide on how to fix a sinking office chair to evaluate stroke lengths and hub heights.
Brace the seat pan firmly against your workbench. Apply sharp rotational torque to the wrench handle to break the taper grip, twisting until the cylinder pulls free.
If you are refurbishing a classic Herman Miller chair, our walkthrough on Herman Miller Aeron replacement gas cylinders covers top-activated versus side activated replacement hardware.
Step 5: Unbolt the Tilt Control Plate from the Seat Pan
The steel control mechanism houses tilt locks, height levers, and resistance springs. Lay the cushion face-down on your moving blanket to access the mounting plate.
Loosen each corner bolt two turns in a criss cross pattern to relieve spring tension evenly. Remove all four bolts, lift the mechanism away, and thread bolts back into the inserts.
Step 6: Remove the Wheels and Casters
Standard chair casters use an 11mm steel stem with a C-shaped split-ring clip.
Grip the caster housing firmly and pull straight out to pop the clip from the socket.
If carpet fibers bind the stem inside the leg socket, wedge a flat screwdriver between caster and base.
Lever a hammer claw downward against a protective rag to pry the stem free without scratching paint.
Upgrading sluggish dual wheel casters to polyurethane rollerblade wheels provides superior rolling performance. Check stem dimensions and floor protection benchmarks in our guide to desk chairs with locking wheels.
Pressure Safety and Mechanical Cautions
Pneumatic chair cylinders contain inert nitrogen gas sealed under 250 to 300 PSI of internal pressure. Standard teardown procedures are completely safe, but reckless actions introduce genuine physical hazards.
Never apply an open flame or heat gun to a stuck gas cylinder. Excessive heat rapidly expands compressed nitrogen gas beyond casing yield limits, risking structural seal failure.
Never attempt to saw, grind, drill, or crush any portion of the cylinder outer housing or chrome piston rod. Doing so punctures the pressurized internal chamber.
Do not unbolt the main coil spring housing on the underside tilt mechanism. The large tension coil is pre-loaded under heavy factory compression and can fly out with significant force if opened.
Recommended ergonomic accessories and hardware specs
Workstation accessories selected to support healthy ergonomics, joints, and cable routing.
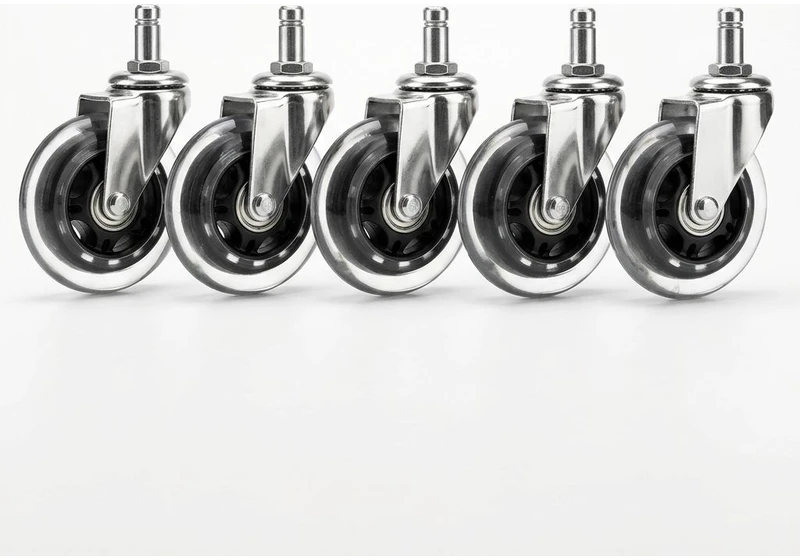
Rollerblade Chair Caster Wheels (5pk)
Heavy-duty polyurethane wheels glide smoothly on hardwood floors without plastic floor mats.
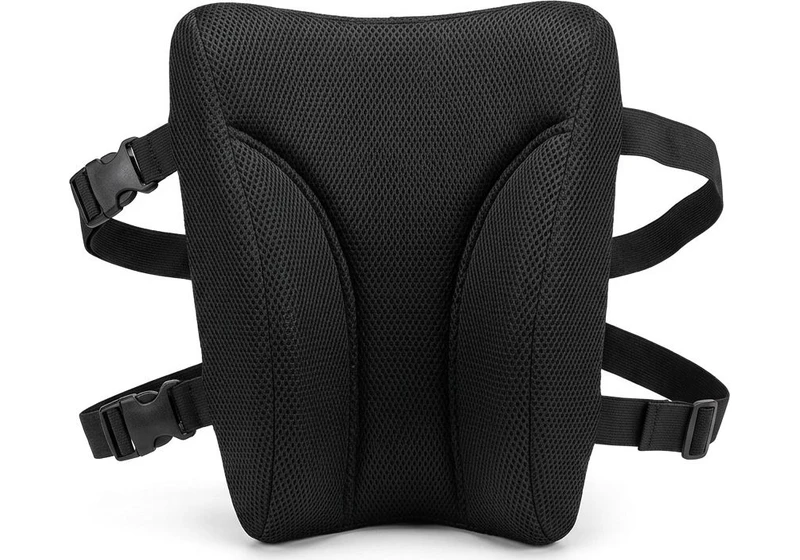
Memory Foam Lumbar Support Pillow
Contoured high-density foam with dual adjustable straps fills lumbar gap on firm office chairs.
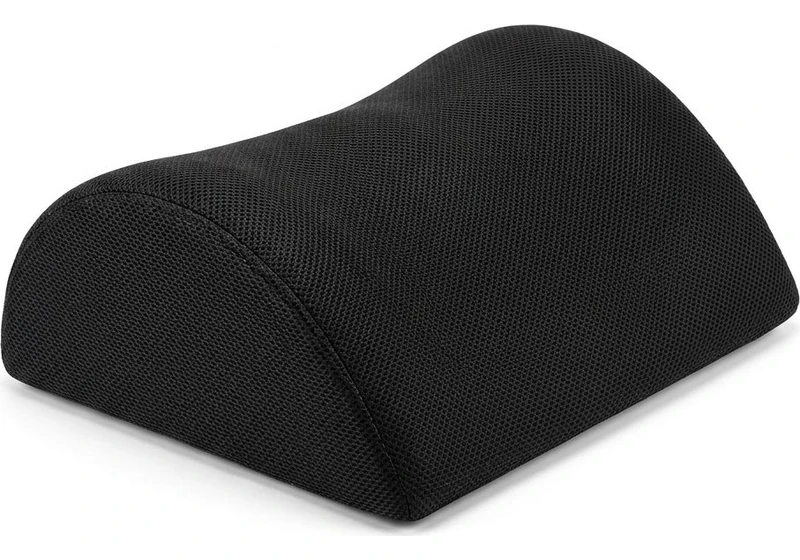
Ergonomic Teardrop Desk Footrest
Raises feet 5 inches to help reduce posterior thigh compression and support pelvic posture when seated.
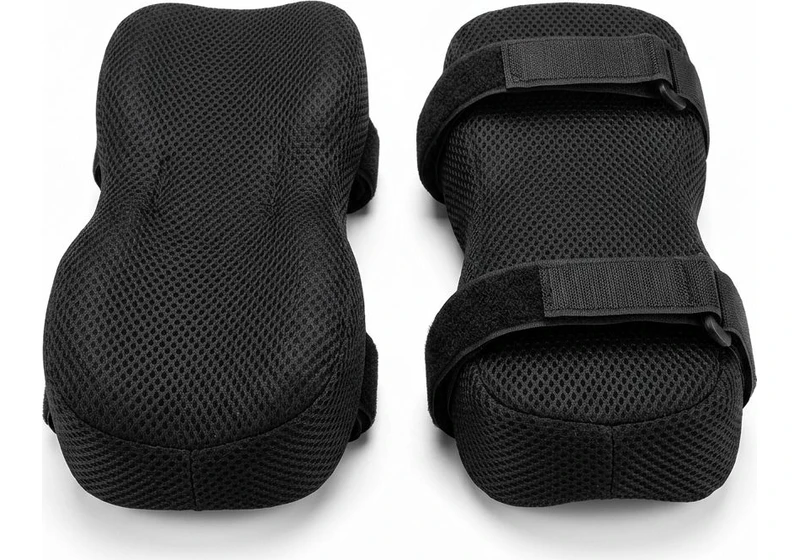
Contoured Chair Armrest Pads (Pair)
Thick memory foam cushions relieve elbow and forearm pressure points during 8+ hour workdays.
Packing and Moving Disassembled Chair Components
Once dismantled, an ergonomic chair packs into roughly one-third of its assembled volume.
Wrap the seat pan and mesh backrest in clean blankets to guard fabric against tears and dirt.
Pack the five star base, cylinder, and tilt mechanism in a sturdy box with cardboard dividers. Place all bolts, washers, and screw covers in a labeled bag taped to the seat plate.
When reassembling your workstation in a new layout, consult our guide on how to organize office furniture to optimize desk placement and walking clearance.
Frequently Asked Questions (FAQ)
Can an office chair be disassembled without damaging it?
Yes, using a rubber mallet against a protective wood block and applying a pipe wrench strictly to the outer cylinder column preserves all components.
This non destructive protocol allows you to rebuild the chair with zero loss of structural integrity.
How do you separate an office chair cylinder that is stuck?
Invert the base, apply penetrating lubricant around the taper joint, and wait five minutes.
Place a block of scrap wood against the bottom cylinder clip and strike the wood firmly with a rubber mallet while lifting the base slightly.
What size pipe wrench is best for chair cylinder removal?
A 12-inch or 14-inch pipe wrench provides the optimal jaw opening and handle leverage needed to twist the cylinder free from the tilt plate.
Never clamp wrench jaws onto the chrome piston rod.
Do office chair casters just pull out?
Standard 11mm grip ring stem casters pull straight out of base sockets with firm hand pressure.
If stuck, pry gently between the caster housing and base leg using the claw of a hammer padded with a cloth.
Can you put an office chair back together after disassembling it?
Yes, office chairs assemble via the exact reverse process.
Thread the tilt plate bolts back into the seat pan, press the cylinder into the base socket, and sit on the cushion to lock the Morse taper joints securely.
Sources & Scientific Literature
- ANSI/BIFMA. (2020). General Purpose Office Chairs: Tests (ANSI/BIFMA X5.1-2017 R2020). Business and Institutional Furniture Manufacturers Association.
- Deutsches Institut für Normung. (2016). Office Furniture: Self-Supporting Gas Springs for the Height Adjustment of Office Work Chairs (DIN 4550). DIN.
- Occupational Safety and Health Administration. (2021). General Industry Safety and Health Regulations: Hand and Portable Powered Tools (Standard 29 CFR 1910 Subpart P). U.S. Department of Labor.
- Human Factors and Ergonomics Society. (2007). Human Factors Engineering of Computer Workstations (ANSI/HFES 100-2007). HFES.
Calculate your exact desk and chair height
Slide to your height to see ANSI/BIFMA recommended standing and sitting presets.
By M. Haris
References ANSI/BIFMA G1-2017 guidanceSoftware engineer and founder of The Desk Riser
M. Haris is a software engineer and founder of The Desk Riser, auditing manufacturer engineering schematics, motorized desk cycle lifespans, ANSI/BIFMA G1-2017 ergonomic standards, and long-term user failure patterns across verified owner communities. Every guide is editorially independent with zero paid brand placements and zero PR samples (we may earn affiliate commissions on qualifying purchases). Have questions or spot a warranty update? Email directly at support@thedeskriser.com, read the Author Dossier, or explore our Editorial Research Methodology.
Share this article:
Workstation Setup & Fit Q&A
Have questions about frame deflection, monitor arm clamp loads, or chair sizing? Consult our workstation researchers.
Q:How do I know if this standing desk will wobble on thick carpet?
Standing desk wobble on carpet is caused by uneven carpet pile compression under the rear footpads. Frames with wedge-reinforced leg collars and wide steel footplates (like UPLIFT V3 or FlexiSpot E7 Pro) minimize lateral flex. If placing on plush carpet, use rigid caster cups or a dense underlay to anchor the base directly to the subfloor.
Q:Can I clamp a dual monitor arm onto standard particleboard tops?
Dual monitor arms concentrate 25 to 45 lbs of dynamic torque onto a 4-inch clamp perimeter. Hollow honeycomb tops (such as IKEA Linnmon) will crush. We recommend a minimum 0.75-inch solid core (MDF, solid bamboo, or hardwood), or sandwiching a steel reinforcement bracket plate (min 2.5mm thickness) between the clamp and desktop.
Q:What if my chair cylinder sinks or feels too high for my feet?
Always verify your seated popliteal height (crease behind knee to floor with shoes). If a chair will not drop below 17 inches and your feet dangle, pair it with an angled footrest or switch to a low-range Class 4 cylinder. If a cylinder loses pressure and sinks on its own, the internal nitrogen seal is breached and requires cylinder replacement.
Ask Our Ergonomic Spec Reviewers
Planning an upgrade or unsure if your monitors and stature fit this configuration? Send your dimensions directly to our research desk. No accounts, no trackers, zero marketing spam.